Manual: Minimal Graphics Settings

watch project
Introduction:
Hello, how are you?, I hope you are very well in your day ... I wanted to tell you that this project was one of the first that I did and I am very proud to have created it and with your support this project is the best selling, I give you a MASSIVE THANK YOU! :) ... I ask you to read the manual carefully and if you have any questions do not hesitate to contact me at my email: cabascarlosandres@outlook.com
Now, let's go there !!
Index
Below will show us a box where it teaches us that things will migrate, when you are sure, click on the OK button
Then locate the migrated files to your project within the "Content" folder and ready
-----------------------------------------------------------------------
Resolution: Contains 5 screen resolutions
Anti-Aliasing: Has four options
Visual Quality: contains two options
Object Quantity: Contains three options (determines the number of objects in the level, affects the
foliage and the view distance)


GFX: Refers to the graphics quality option this variable handles the scrolling value of graphics quality scroll box (go to the menu widget and search for ScrollBox_Graphics)
VFX: Refers to the visual quality option this variable handles the scrolling value of the scroll box in
visual quality (go to the menu widget and search for ScrollBox_Visual)
DefinitionC: Refers to Anti-aliasing counter
GFXC: Refers to the graphics Quality counter
DefinEnum: Refers to the value of options in the enumeration of "DefinitionEnum" which is the option of anti-aliasing
Gamma: Variable that adjusts the brightness of the screen
DefinitionDer and DefinitionIzq: Refers to the right and left buttons of anti-aliasing
GFXDer and GFXIzq: Refers to the right and left buttons of graphics Quality
VFXDer and VFXIzq: Refers to the right and left buttons of Visual Quality

watch project
Introduction:
Hello, how are you?, I hope you are very well in your day ... I wanted to tell you that this project was one of the first that I did and I am very proud to have created it and with your support this project is the best selling, I give you a MASSIVE THANK YOU! :) ... I ask you to read the manual carefully and if you have any questions do not hesitate to contact me at my email: cabascarlosandres@outlook.com
Now, let's go there !!
Index
- Migrate this project to yours
- Let's look at the menu
- How does it work?
- Thanks
-----------------------------------------------------------------------
1. Migrate this project to yours
Right click on the UI folder
 |
| Source: Own creation |
We click on the option "Migrate"
 |
| Source: Own creation |
Below will show us a box where it teaches us that things will migrate, when you are sure, click on the OK button
 |
| Source: Own creation |
Then locate the migrated files to your project within the "Content" folder and ready
 |
| Source: Own creation |
-----------------------------------------------------------------------
Let's look at the menu
 |
| Source: Own creation |
Resolution: Contains 5 screen resolutions
- 640x480
- 800x600
- 1024x768
- 1280x720
- The last resolution is captured of the screen of your PC
Anti-Aliasing: Has four options
- NO: Disables anti-aliasing
- NORMAL: Smoothing Balanced images
- SMOOTH: Defined images
- VERY SMOOTH: Even more defined images
V-Sync:
- YES: Enable Vertical Sync
- NO: Disables Vertical sync
Full screen:
- YES: Full screen
- NO: Window mode
Frame Rate: Has four options
- 30 Fraps
- 60 Fraps
- 90 Fraps
- Variable (The frames vary according to the power of the PC)
Graphics Quality:
- POOR: Low Graphics quality (disables shadows and low texture quality)
- BALANCED: Graphic quality
- BEST: High quality graphics
- REALISTIC: Maximum graphic quality
 |
| Source: Own creation |
Visual Quality: contains two options
- NORMAL: Balanced visual quality
- BETTER: High visual quality
 |
| Source: Own creation |
The “Arrow Right” and “Arrow Left” are buttons which contains a triangle-shaped image lying. The “Different Options according to its function” are scroll box
--------------------------------------------------
Each option has its guide where it explains its respective function
--------------------------------------------------
Each option has its guide where it explains its respective function
 |
| Source: Own creation |
Object Quantity: Contains three options (determines the number of objects in the level, affects the
foliage and the view distance)
- MINIMUM: Few objects in the level
- NORMAL: Quantity of Standard objects
- MAXIMUM: Maximum number of objects in the level
 |
| Source: Own creation |
Brightness: Adjusts the brightness on the screen. The more to the right is the circle, more brightness
 |
| Source: Own creation |
-----------------------------------------------------------------------
How does it work?
I will explain the operation in detail of how the menu modifies the graphics of the editor. I will try to explain as simple as possible
 |
| Source: Own creation |
This is blueprint where all the magic comes out, is it small right? Nice!... begin to explain the operation of the shortest and most understandable way possible, start explaining by sections.
I clarify that for this to work, I used the node "Get Game User Settings". To know more enters:
In this blueprint, there are some macros created by me that perform a different function. Macros are:
I think there is no need to explain what each and by his name macro has an idea of what it does, but if I explain the structure of some macros that maybe are tedious to understand, for that I'm here to show to you…. Nice!
Explanation of UI_Graphics Blueprint Custom Node Explanation
There are others that have a structure like the image below that is easier to explain why just
handles two options, and depending on which option apply the graphics options and then
the same process happens as explained below.
-------------------------------------------
There are some macros that have a similar structure in this way like the image above, which are:
- SetResolution
- SetAntiAliasing
- SetFrameRate
- SetGraphicQuality
- SetObjectQuantity
All these macros work in the same way and I will step by step to understand your operation, we
will take the example of SetResolution.
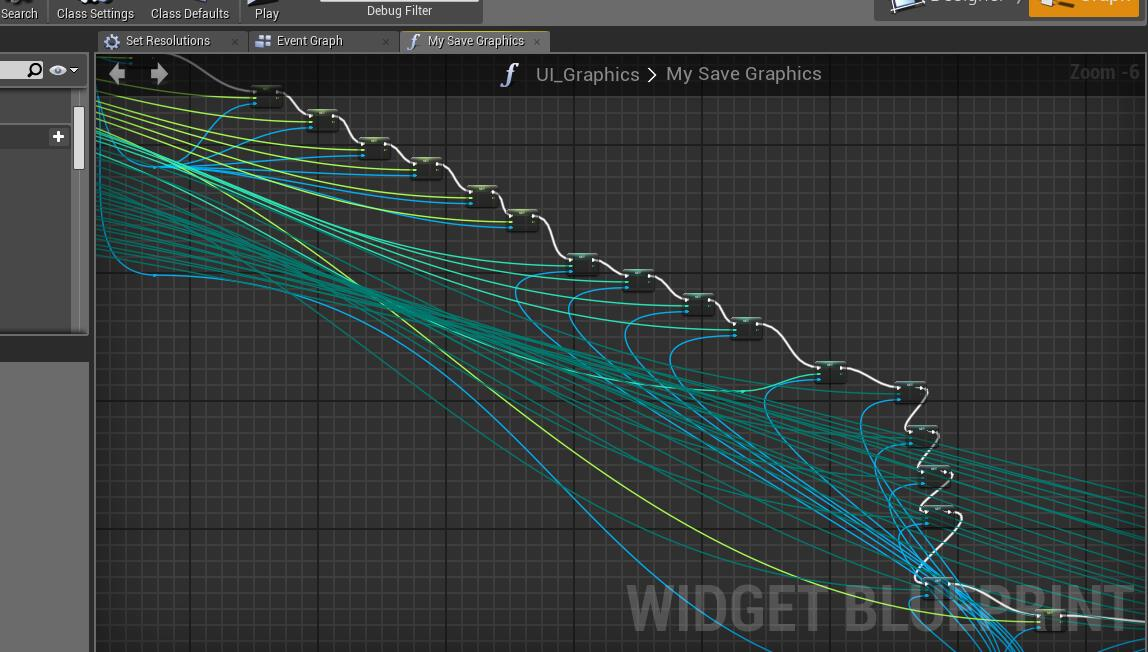
The other values go to the node called "My Save Graphics". This is where all the settings are stored, counter values, enumeration values, scroll box scroll values
All of these values are stored in an object of the type SaveGame which creates an SAV file where these values are physically stored
This file named "Graphics" will find it in the following file path Unreal projects \ "YourProject" \Saved\SaveGames
Now explain how the "My Load Graphics" node works
All those values go to the next node, My Update Graphics
This is the node where you apply all the graphical settings and update them if the user has changed
any of them Simply introduces these updated values to their corresponding node to update their values, for example updates the scroll box scroll value, or update the behavior that must have a button and so on. The node is long, I invite you to analyze it and understand it
Additional
In the UI/Enums path you will find the blueprints of the enumerations, the one called "DefinitionEnum" is the one that has the options of the anti-aliasing setting, "GFXEnum" is that it contains the graphical options
In the UI/saves path you will find the blueprint where all the values that the Graphics menu requires are saved
You must know the meaning of some variables to understand more how it works:
Definition: Definition is anti-aliasing but this variable handles the scrolling value of the Anti-aliasing scroll box (go to the menu widget and search for ScrollBox_AA)
GFX: Refers to the graphics quality option this variable handles the scrolling value of graphics quality scroll box (go to the menu widget and search for ScrollBox_Graphics)
VFX: Refers to the visual quality option this variable handles the scrolling value of the scroll box in
visual quality (go to the menu widget and search for ScrollBox_Visual)
DefinitionC: Refers to Anti-aliasing counter
GFXC: Refers to the graphics Quality counter
DefinEnum: Refers to the value of options in the enumeration of "DefinitionEnum" which is the option of anti-aliasing
Gamma: Variable that adjusts the brightness of the screen
DefinitionDer and DefinitionIzq: Refers to the right and left buttons of anti-aliasing
GFXDer and GFXIzq: Refers to the right and left buttons of graphics Quality
VFXDer and VFXIzq: Refers to the right and left buttons of Visual Quality
THANKS
Thank you for buying this product I'm really grateful for your help, I hope this product will help you realize all your projects you dream more. I come back and I repeat thank you very much again ☺ ☺
Download manual.pdf
Download manual.pdf
Comentarios
Publicar un comentario